Categories Creation Guide in Buzzcart
This document provides a step-by-step process for creating a new category in Buzzcart using the admin panel.
Steps to Create a Category
1. Navigate to Category Creation
-
From the Admin Tools menu on the left sidebar, go to Catalog > Category.
-
Click on Create New Category.
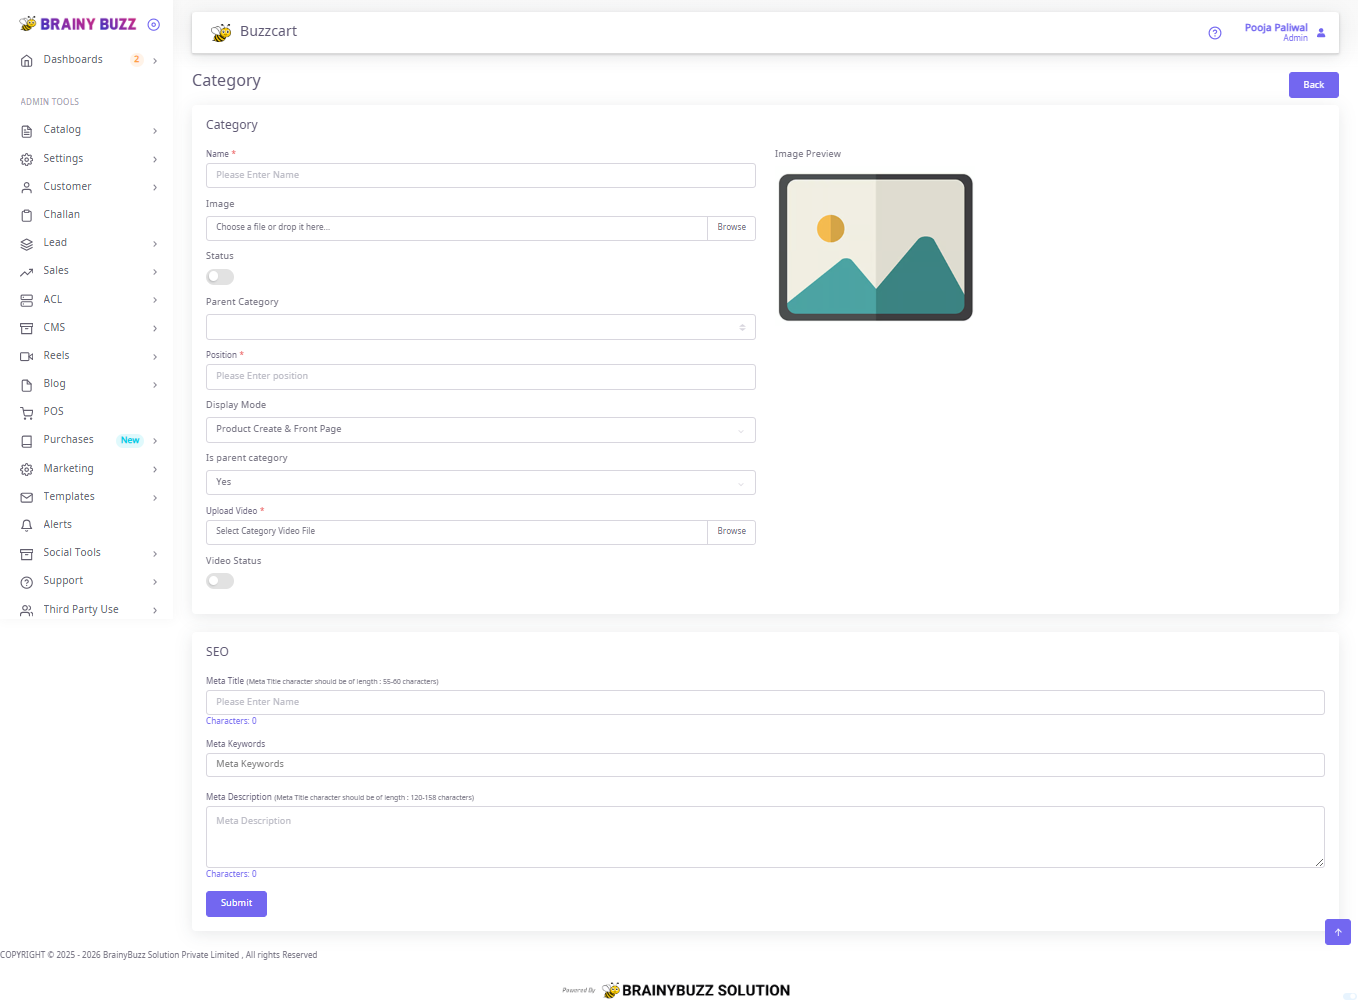
2. Fill Category Details
1. Name
-
Enter the category name (e.g., "Earrings", "Necklaces").
-
This is a required field.
2. Image
-
Upload or drag-and-drop an image representing the category.
-
Click Browse to select a file.
-
Once uploaded, the image preview will be displayed on the right.
3. Status
-
Toggle ON to activate the category.
-
Toggle OFF to keep it inactive.
4.Parent Category
-
Select a parent category if this new category falls under an existing one.
-
Leave blank if this is a top-level category.
5.Position *
-
Enter the numeric position/order for display.
-
Lower numbers typically appear first.
6.Display Mode
-
Choose how the category will appear.
-
Options: Product Create & Front Page.
7.Is Parent Category
-
Select Yes if this will serve as a parent category.
-
Select No if it belongs under another parent.
8.Upload Video
-
Upload a category-specific video file (if available).
-
Use Browse to select and upload.
9.Video Status
-
Toggle ON to enable video display for this category.
-
Toggle OFF if no video should be shown.
3. SEO Settings
1.Meta Title
-
Enter an SEO-friendly title for the category.
-
Recommended length: 55–60 characters.
2.Meta Keywords
-
Provide relevant keywords separated by commas.
-
Example: earrings, jhumka earrings, indian jewellery.
3.Meta Description
-
Enter a concise description of the category.
-
Recommended length: 120–158 characters.
4. Submit the Category
-
Once all fields are completed:
-
Review the details.
-
Click on the Submit button at the bottom.
-
Notes
-
Fields marked with * are mandatory.
-
Ensure images and videos meet size and format requirements (as per system standards).
-
SEO details help improve search visibility on Google and within the site.