Post Creation — Steps
Purpose
Create a blog/post entry. After entering basic post info, upload the Featured Image first, then add additional images and complete the post.
Steps
-
Open post creation
- Navigate to Blog → Create Post (or open an existing post to edit).
-
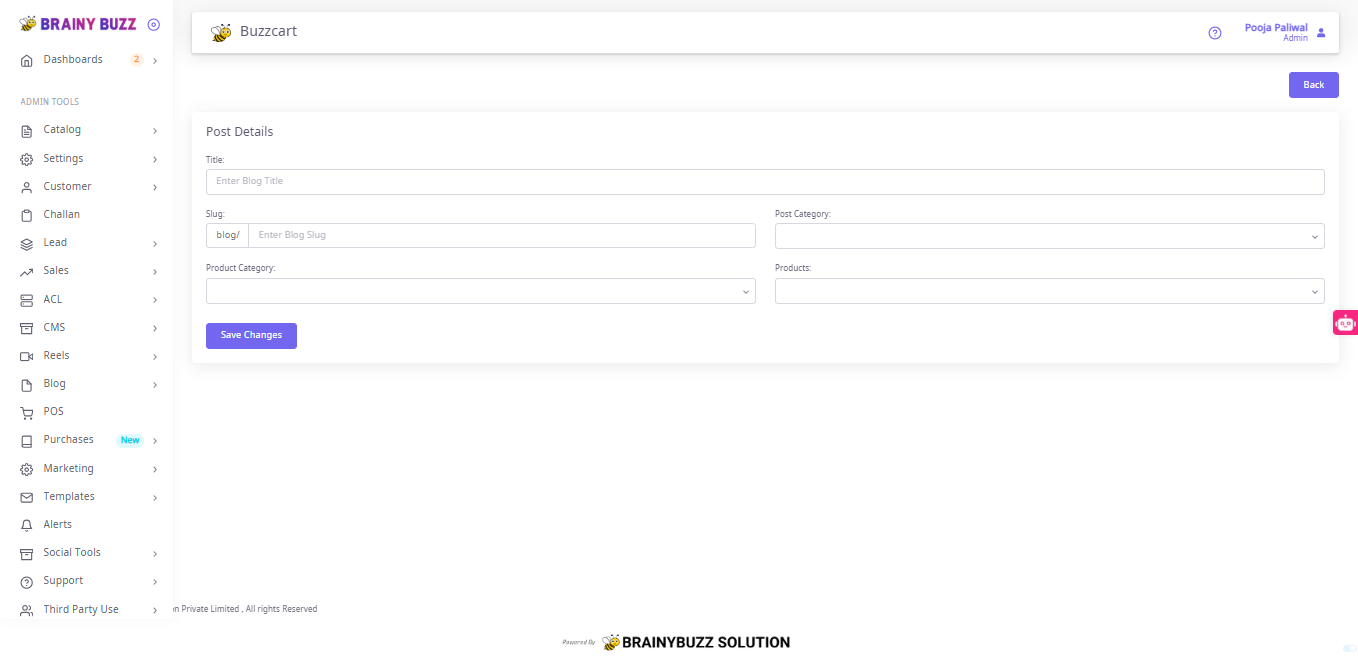
Enter basic Post Details
- Fill Title.
- Fill Slug (prefilled prefix `blog/').
- Select Post Category (required).
- (Optional) Select Product Category and Products.
- Click Save Changes to move to the edit view.
-
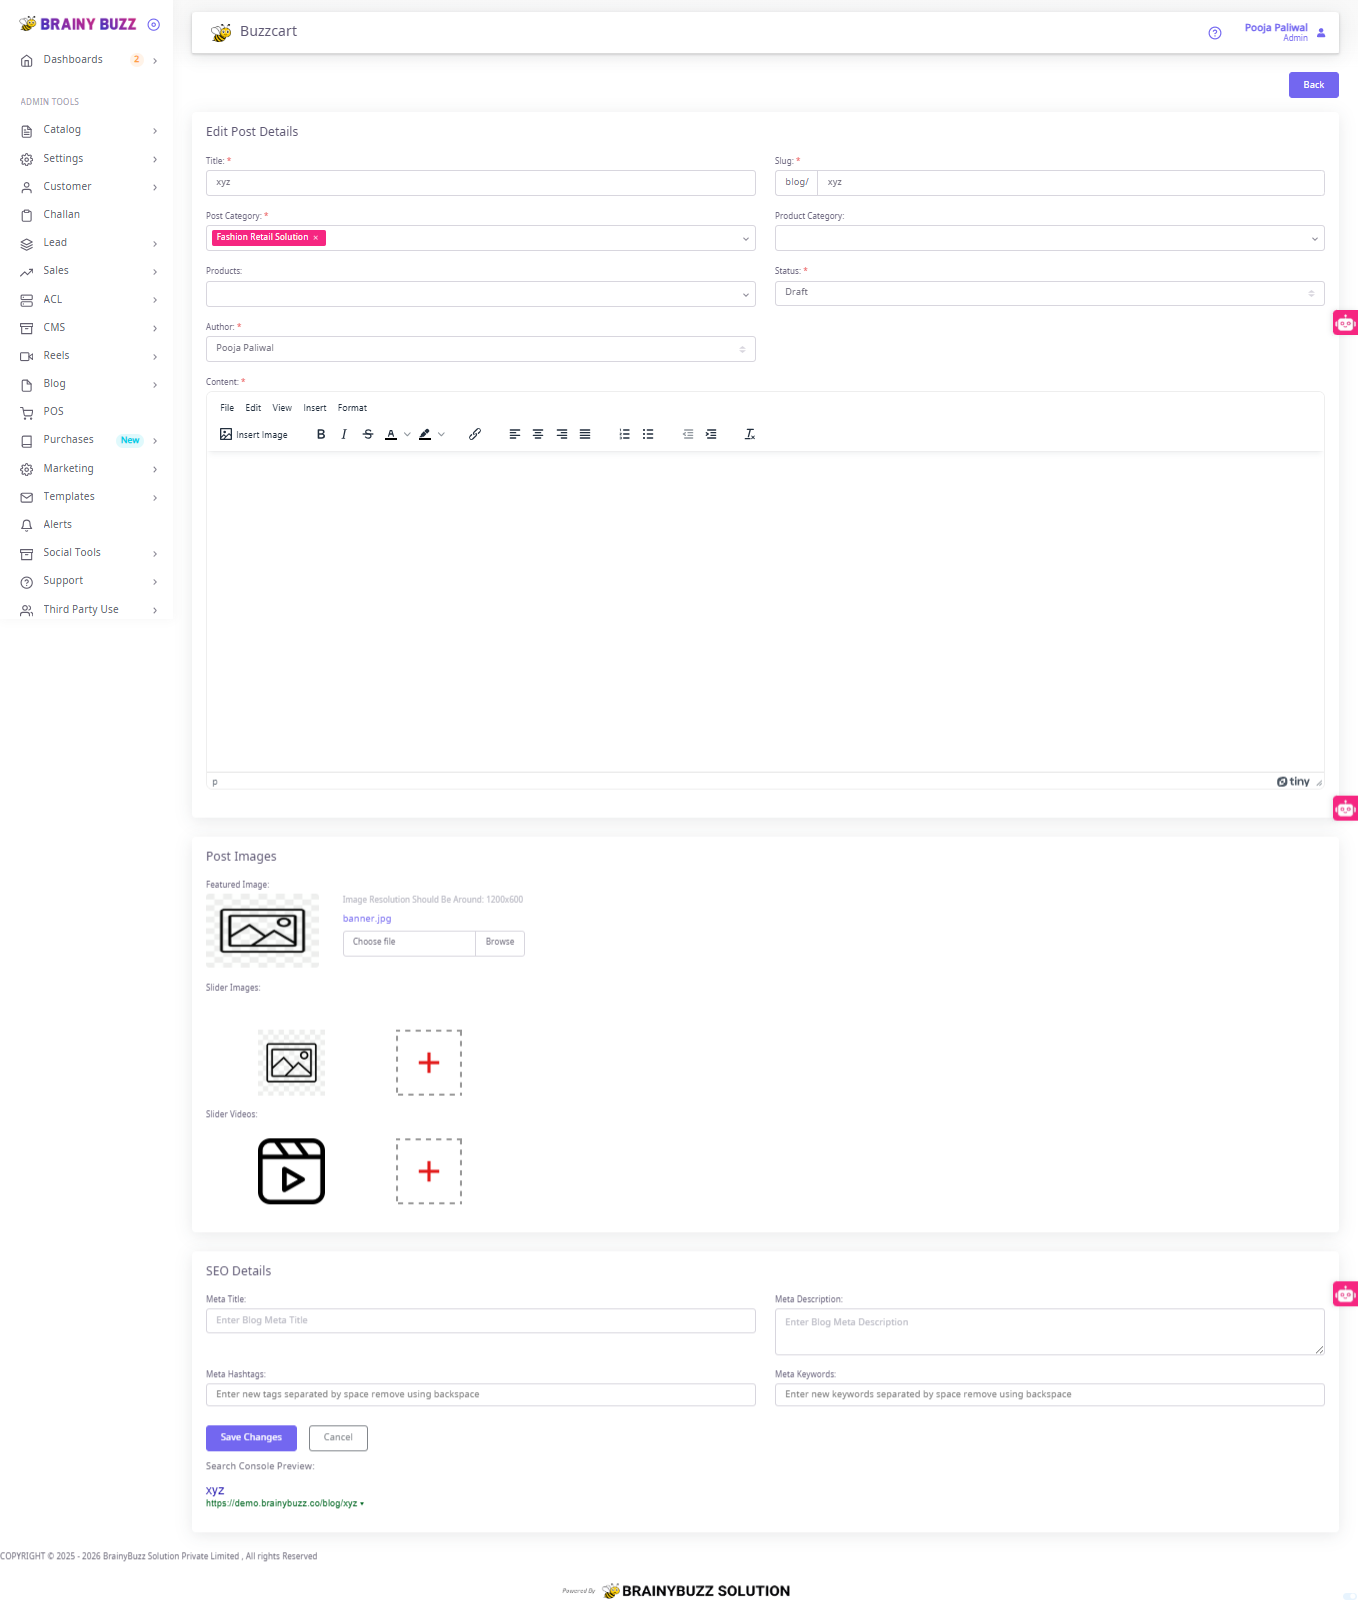
Fill post content and meta
- In Content, enter the post body using the rich-text editor (insert images, format text).
- Confirm Author
- Set Status (e.g., Draft, Published).
-
Upload Featured Image first
- Scroll to Post Images → Featured Image.
- Click Choose file / Browse and select the image.
- Verify the image appears in the Image Preview area.
- (Important) Uploading the featured image first ensures the post has a primary thumbnail before adding sliders.
-
Add slider images (additional images)
- In Slider Images, click the + placeholder to add the first slider image.
- After the first slider image is uploaded, a new + placeholder appears — repeat to add more images.
- Remove any unwanted slider image by using its remove control (if shown).
-
Add slider videos (optional)
- In Slider Videos, click + to upload video files if needed.
- Repeat for multiple videos.
-
Add SEO details
- Fill Meta Title.
- Fill Meta Description.
- Enter Meta Hashtags (separated by space).
- Enter Meta Keywords (separated by comma/space).
-
Final save
- Click Save Changes (or Update) to persist images, content, and SEO.
- Confirm the saved post displays the featured image and slider images correctly.